Thursday, January 31, 2013

Hey Buddy, Can you Spare Some Change?

Life is all about change and change is good. In the past couple years, my life has changed completely. This blog will no longer be only about cycling (hence the new name). While cycling is still a passion of mine, I have acquired additional passions. Passions that are exciting, fulfilling and scary all at the same time. I hope you will join me on this journey of change.

If you were to tell me 10 years ago that I'd be living in Flagstaff on 4 acres with three kids, two cats, a dog, 3 goats, 35,000 bees, and 40+ chickens; I would have said you were nuts. But that's exactly where I am and I love it! 

No longer in the midst of suburbia where my house looked like the neighbor's whose house looked like his neighbor, and so on; I am now "in the sticks". I have added a couple more roles in my life as well. I am now a chicken farmer, goat raiser, gardener, constructor, and maintenance person. I will be writing about these topics as well as cycling and anything else that may pop into my head as I'm clearing tumbleweeds or mucking out the goat barn. 

I hope you will join me on this adventure, it's sure to be interesting!

Tuesday, January 29, 2013

What's in a Name?


So the title of my blog is "Life in the Bike Lane". In the past, almost all my posts were about cycling in one way or another. 

Now that I live somewhat remotely; there's so much more going on in my life other than cycling,  and much of my cycling isn't in a bike lane or even concrete for that matter; it might be time for a name change. 

Here are a few that I'm kicking around:
My Life
Life as an Urban Farmer
The Homestead

What do YOU think I should call it?

Pallet Chicken "Compound"

One of the goals of moving out of the burbs was to be more sustainable and grow our own food. Before we had the infrastructure to put in a proper garden, we decided on raising chickens. 

Chickens. How hard could it be? I found someone selling 4 hens on Craigslist and contacted her.  We picked a morning that would be best for me to come get "the girls" and the ball was set in motion. Now, I need to build a coop. 

I had been reading about building a coop out of pallets and thought that it would be fairly simple to do. Since we have a dog, and I don't trust him around our chickens, I decided to also build a yard for the girls instead of letting them free-range in the yard. We also have fox, coyotes, & stray cats to contend with, so a yard was definitely in order. 

I decided that since we only had 4 girls a coop 2 pallets wide with a yard 3 pallets by 2 pallets would suffice. The coop was pretty straight forward. I used pallets for the floor, walls, and roof. I had some plywood left over (from something) so I put that down as the floor. I brought the girls home and put them in their new coop (closing the door) while I worked on the yard. I figured since these hens were laying already, they wouldn't be able to get through the slats in the pallets. WRONG! It probably looked comical to any passers by to see a guy building a coop and chasing chickens back into it as fast as he could board up another hole. As I look back, it was pretty funny. 

I will take you through the process of building what I now call "The Compound". My goal was to spend as little as I could on this coop and maximize recycled materials. 

They say that urban chicken ownership is an addiction, and it is. We now have 16 hens and a rooster and the "coop" has grown and seem to continue to do so. 

Step 1. Collect a bunch of pallets. My original plan was to build the coop 2 pallets wide and 1 high. 10 pallets, no problem. The yard will be 3 pallets by 2 and one of the walls will be the coop for 18 total. I used slats from extra pallets to close the gaps to prevent future escapes. I think for this part of the project I used about 25 pallets in total. The great thing about using pallets is that all the scrap can be used elsewhere or burned.

The above picture is the completed coop and the start of the yard. I used some cinder blocks left over from the burnt down trailer on our property to raise the coop up off the ground some. The coop is held together entirely with bailing wire. I had an old roll of it in the tool box and didn't really have a need for it until now. Truth be told, I think it was my dad's old roll which makes it vintage bailing wire. Shortly after this picture was taken is when I put the girls in and started rounding them up as I built. 
This is Ginger. I named her Ginger after the chicken from the movie Chicken Run. In the movie, Ginger was the ring leader and always planning the next escape. She was the one hen that I chased the most back into the coop. Unlike the movie, the goal has never been to make her into a pie. 
Coop and yard complete. I bought a bale of hay to put inside for the girls' comfort and the nesting box. 
Here's a pic of the nesting box. Of all the research I did, it was almost unanimous that having the nesting boxes accessible from the outside was a great convenience. This way, we won't have to crawl inside and get the eggs. You can also see the gaps in the pallets that needed to be filled. At this point I started using some screws to attach the boards to the nesting box frame. The frame was built from pallet 2x4s and the boards are pallet slats. For the hatch, I used an old piece of 1x12 I had laying around. So far in materials, I've spent $0!
I had some field fencing left over from the fencing in the front and back of my property so I used some of it to cover the yard. This serves 2 purposes; 1 hens can't fly out, and 2 predators can't fly in. 

The nesting box. I had it divided in half in case 2 hens wanted to go in at the same time. Turns out, they take turns AND like to use the same side. I thought that maybe each girl would have a preference. Nope. All the eggs are on the same side typically. I also needed to hinge this lid. Being the cyclist that I am, I happened to have a blown bike inner tube so I used that as the hinge. I added a couple eye hooks and bungee cord to prevent Ginger for organizing another escape plot. 
Our very first egg! This was laid only about 30 minutes after completing the coop. I walked away and was putting my tools away when I heard "the victory call". I went over to see what was going on, looked in the nesting box and found this.
Here's a look inside the yard. I didn't want the door to be too big so another piece of scrap plywood was used to shorten it. I also used more cinder block pieces to close up the holes under the coop (Ginger-proofing). You can see they love to kick the hay around and much of it flies out the door. 

Our neighbors, who also have chickens, had a hen that kept escaping over their fence and messing up the garden. They didn't want to get rid of her, so the natural option was for "Chickmine" to join or flock. She was the smallest and lightest of their flock and could fly over their fence. Since our yard is enclosed, that wasn't going to be an issue. 


Since we had another hen, I thought the roost might be getting a little crowded. The roost, by the way is a tree branch picked up from the yard and cut to the right length. It took a little time to find the right diameter and length, but the kids helped and it was done. Since the roost was getting crowded, I did what anyone else with a chicken addiction would do. Build a room addition! Same concept. I used 4 pallets and secured the escape routes before giving the girls access. I decided that since I was building another room, another nesting box would give the girls a choice. I also added an access door for myself or anyone going in to clean up poop. Yeah, me. I'll have a picture of those later in this post.
I had to trim the pallets on the end at this point because they hung over the bottom. Piece of cake. A good hand saw took care of this task. 

Early in 2012, we bought some baby chicks with our neighbor. They bought 2 and we bought 2. It was getting to be summer and the chicks were old enough to be introduced to the flock. Their 2 had already been introduced so it was time to bring our 2 over. 
I did some internet research on the best way to introduce new babies to the flock and the majority of owners said to introduce them inside a "tractor" within the yard to let everyone get used to each other. Ok, now I gotta build a tractor. Keeping with the re-purposing theme, I used some left over lumber (2x3s), some pallet pieces, some poultry wire that I found, and 2 pieces of flexible water tubing left over from running the water line to the house, and viola! One chicken tractor! I wired everything together with bailing wire of course. I put a little cove on top to keep the sun out made from an old chicken feed sack.I also built a little nesting box for them should they get the urge to nest. Total cost $0!
Enter Elvis & Lightening. These are 2 of the 4 hens we bought with the neighbors. Elvis is the tall one named by Torrey, and Lightening is the little one named by Matthew. The kids have had so much fun naming the chickens. So far, we have:
Elvis
Lightening
Ginger
Marti, the striped one that looks like the zebra in Madagascar.
Goldie, the fluffy golden one
Chickmine, from the neighbor
Thunderhead, the Rhode Island Red

We thought Elvis was a hen until one day we heard the cock-a-doodle-doo of a rooster. I guess that's what happens when you name a hen Elvis. 

With the tractor in the yard, it was getting crowded. The girls didn't have a whole lot of space to scratch and forage, so it was time for an expansion of the yard!
I added one more pallet to the width and one more to the length making the new yard 4 pallets by 3. With this extra width, there was no way the field fencing top would stay up. I bought, yes, bought some pvc conduit and made arches for the wire fencing to rest on. I guess it's kind of re-purposing since that's not what pvc conduit is made for, just not recycled. I also decided to make the yard  taller so I wouldn't have to duck walk inside when changing the water or cleaning up the mess they make. The little ones have been integrated into the flock and everyone seemed happy. We were getting on average 3-4 eggs per day. 

I usually make a habit of checking the "farm and garden" section of Craigslist. One night, I found a lady thinning her flock and looking to get rid of 4 hens. Considering my addiction, naturally I called. She was selling her hens for $10each. They were already laying and just needed a new home. She also had a rooster that was not so nice to the girls and was picking their feathers off. We decided to integrate these girls to our flock at night when they are roosting. It is said that sometimes if you add new hens to a flock at night, the flock accepts them as if to think "were these girls here before and we just didn't notice"? So she brings over the hens and gives me 2 extra hens because she's thinning her flock. Our flock just almost doubled. 

The girls were doing fine in the coop. They were all getting along with only the occasional squabble (establishing the pecking order) literally. At this point Terri is telling me "No more chickens . 13 is enough. how many do we really need?" 

Fast forward a couple months. I'm driving back from a business trip in Albuquerque and talking to Terri. She asks "what are you doing tomorrow?" "Working, why", I ask. "Someone at school is giving away 4 chickens, you need to go pick them up". It seems my addiction is contagious! I picked up the 4 "new girls" the next day and put them inside the yard while inside the dog's crate (pictured at the top of this entry). The one that looked like Marti was going crazy after a couple hours. Picking fights with Marti, Elvis, and anyone that would come close. She was pacing and going a little loco. Get it? El Pollo Loco? Never mind. I let the new girls out and "the new Marti" quickly established herself at the top of the pecking order. She now rules the roost!

Now it's really getting crowded in the coop. Yep, you guessed it. Time for another room addition.
I had a long pallet that we were using as a table for the kids that I decided to use as the back wall. 2 pallets for the floor, 2 for the walls, and we have another room! This is called the big room since it's the biggest addition (so far). For the roof, instead of pallets, I used an old door that I had in the yard. Before you start thinking my yard looks like Fred Sanford's, I replaced a door at the kids' school in the spring and took the old door with the intention for using it for a shed. This need showed itself first. The pink bin on top is the scratch for the chickens. Basically cracked corn that encourages them to scratch in the yard. I have to keep it up high because the goats like it too. 

In the above picture you can see the second nesting box and the access door between it and the big room. A closer-up picture is below. 
Being the hardware geek that i am, I used a door hinge for the nesting box this time. To be honest, the inner tube hinge wasn't working all that well. I replaced it with a door hinge as well. 
Here's a view inside the access door. You can only see one of the roosts but there are two more behind it. The funny thing with these chickens is they love to come see what I'm doing. Maybe it's because I'm usually the one that delivers the table scraps to them. Elvis is always keeping his eye on me. Anytime I'm checking the coop for possible additions or repairs, he's right there. I think he's trying to tell me that he's the head rooster. 
Here's a picture of the first nesting box with the new hinge. I also got some fiberglass corrugated roofing materials from a guy on Craigslist. I put that on top to keep out the rain. I had a small piece of gutter left over from my house gutter project so I added that on to collect rain water for the girls to drink. I only had enough corrugated material to do 2/3 of the roof, so the other part has a sheet of plywood that the same guy on Craigslist was giving away. 
This is a close up of the "hinge" to the yard gate. Periodically, we have to go into the yard to clean up or refill water. I took a piece of rebar that was laying in the yard and drilled some holes down one edge of the pallet and now it's hinged. We secure it with a bungee cord to keep the girls in. 
This is a look inside from the opposite end of the access door. You can see a couple 2x4 roosts and a branch in the back corner. On the right side of the screen, you can just see Elvis' tail feathers. Again, he's keeping a careful watch on me while sitting on the fourth roost in the main coop. There is another 2x4 roost in the big room. The 2x4s came from pallets that I took apart to use the slats. 
Here is a picture of our happy hens in the yard. The plastic contraption is for their feed and the 2 metal ones are for water. The main feeder is inside so that the food doesn't get wet. I had no ideas that chickens drank so much water. We started with the smaller water conaitner and found ourselves refilling it every couple days. That one holds 2 gallons of water. I found the big one on Craigslist for $5 along with the plastic feeder and another plaster waterer. Naturally, I snatched them up. 
Here is one of the new girls in the nesting box. I try to keep plenty of hay inside for their comfort and so they can build their nest each day. They all seem to have different preferences of the nest so it gets built and rebuilt several times a day. During this process, hay seems to disappear. 
This is our compound. I've learned so much about building with pallets and chickens form this project that I am already planning in my head what I will do differently next time. You're probably thinking "next time?!". Yes, I would like to take what I've learned from building this compound to do it right. This one, as you've read was put together quickly, and added onto , and added on to. I'd like to build one structure and not have it look like a "shanty town". I have some ideas for keeping the coop cleaner, and easier to manage. Some of my ideas include an easier cleaned flooring such as linoleum, some storage for cleaning tools and feed, making it easier to enter, rig up some sort of solar electricity and make it more weather proof. By taking my time, I can do it right. I'll probably start sometime next spring or summer. 

I think in total I have about $40 into this compound. Not too bad considering that much smaller coops cost hundreds of dollars. The goal wasn't to be completely cheap, but to re-use materials for this project. The only "new" materials used was the conduit and the hinges. Everything else was re-purposed materials.  

I hope you enjoyed reading about this project. Next up, is the goat barn and storage shed/shop. But until then...maybe I can expand the yard some.


Update: We have more chickens! I need to step up the new coop & make it bigger. I will document the progress as I go and post plenty of pics!

Saturday, January 12, 2013

I Need Help!

My name is Eric and I have a chicken addiction.


Here's my story:

I started with 4 hens. Things were going along fine and I was content with my little flock.


We went in with our neighbors on 4 baby chicks and split them. Now I'm at 6.


I found a listing on Craigslist where a lady was selling 5 hens for $5ea AND throwing in an additional 2 hens. SOLD! Now I'm at 13. Still manageable. At this point my wife tells me "No more, we're done"! Granted this all happened in a matter of 2 months so I can understand her shock at my new addiction.


Fast forward 3 months. I'm driving home from an out of town trip so I called home to see how the kids were doing. My wife asks, "what are you doing tomorrow"? "Working, why"? "Someone from school is giving away 4 hens and looking for a good home. I told her you'd come by to get them". After my laughter subsided, I naturally agreed. I'm a chicken addict, what am I supposed to do?

So I'm at 17. 16 hens and a rooster named Elvis.


I check the farm and garden section of Craigslist fairly regularly for things I can use around the yard. Maybe add on to the coop or goat barn. I stumbled across an add for 24 chickens AND a coop for $50! Naturally, I nearly jumped out of my seat. I called and the young lady said they were still available but she was waiting to hear from some other people by the end of the day. I'm hopeful since she lives in the same area as me and the other interested parties were from out of town and would take a couple days to get them.


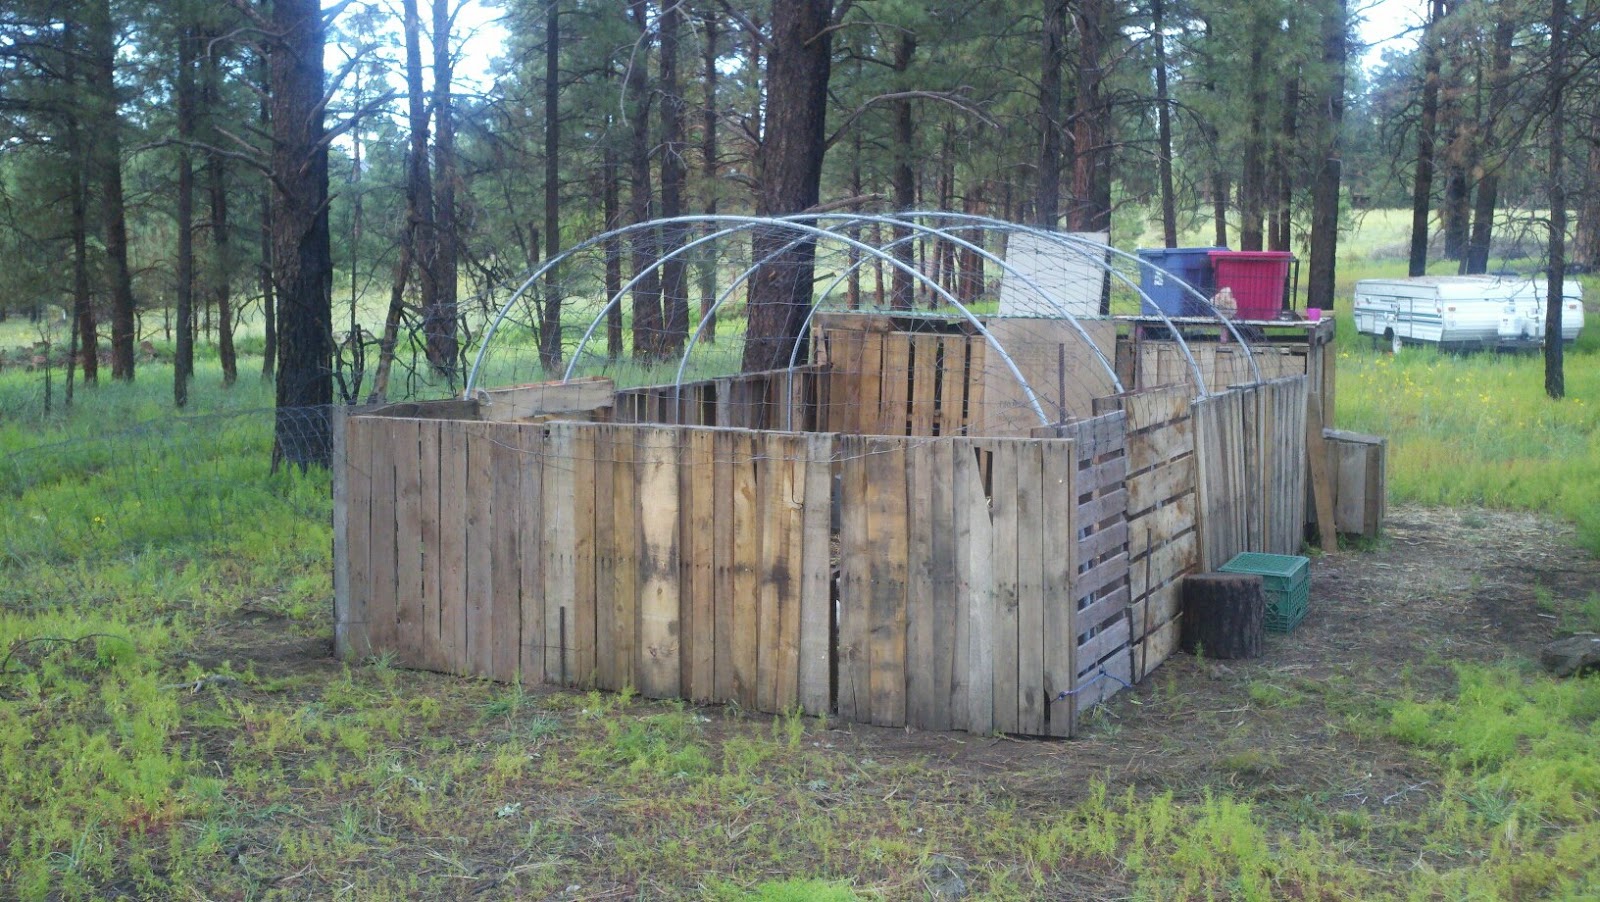
I'm in the process of building a bigger coop now. Looks like I may have to go just a little bigger. Stay tuned...

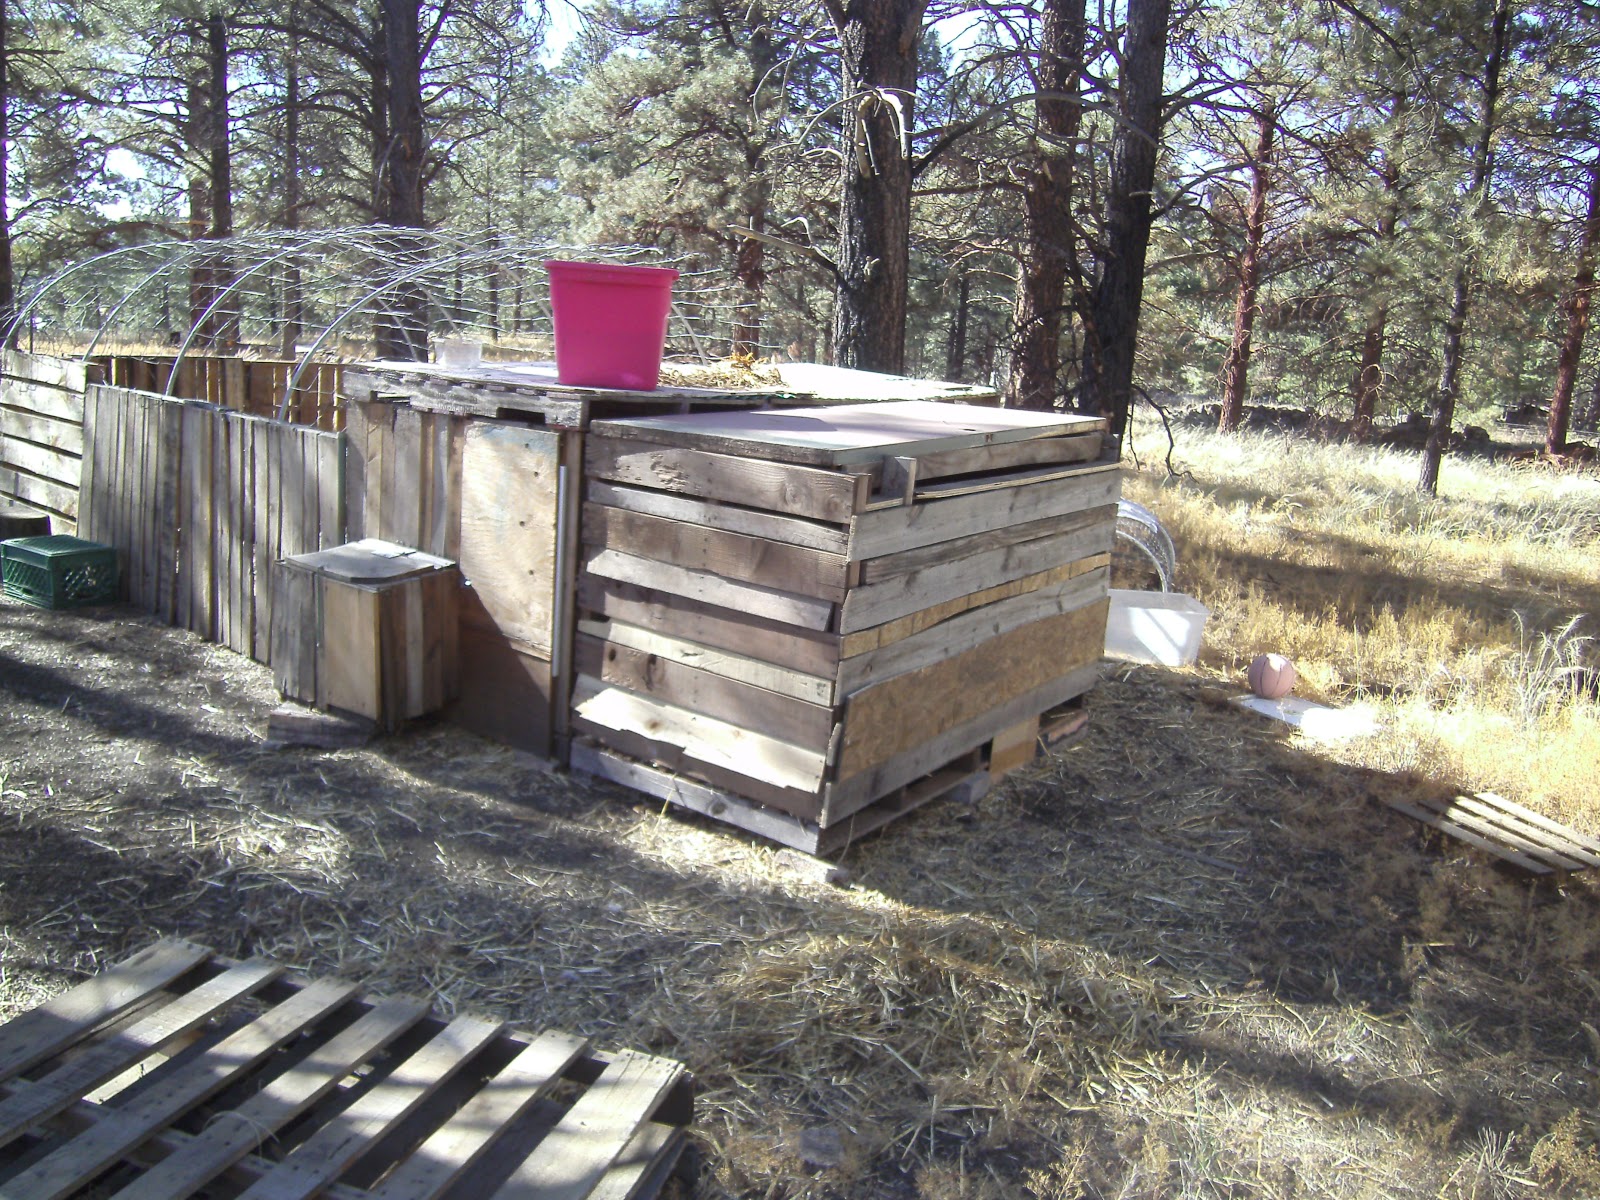
Update. I called and the 24 chickens were still available! The lady's husband said he wanted to sell them to me because I was local. Cool! So I loaded up the coop (with the chickens inside) onto my trailer and brought them home. I built a run for them out of pallets (of course) and placed their coop at the entrance. I gave them some food and water and threw some scratch on the ground to encourage them to scratch at the ground for bugs. They seem to be happy. Their coop is elevated about 18" off the ground and has a ramp which they use to get in and out off the coop. When I opened their door to let them out into the run, Elvis and a few hens were watching through the fence at their new neighbors. It was funny to see them just standing there taking it all in. 

For those keeping score, that puts me at 41 birds. 

Here's the new coop (with 24 chickens inside) ready to be unloaded from the trailer. Just need one more strong dude to help me unload it.
 
Here's the new coop at the end of the new run. I was able to recycle the old run cover and use it here. The run's completely covered and the chickens can go under their coop to get out of the elements if they want.
Here are most of the new chickens enjoying being let out of their coop and exploring the run. 
 
This is one of the 2 roosters we got. He's HUGE. He is a Blue Cochin and is extremely fluffy. The towers over all the other chickens by almost 1/2 a hen! I'm not sure what to name him yet. I was thinking "Mr. Fluffy Pants", but I think i want to see what his personality is like. 
There is a 12 step program for this condition. It goes like this:

Step 1.Admit that you have a problem.
Step 2. Let the enablers (those that introduce you to new breeds of chickens you don't have yet),  know that you have a problem.
Step 3....Purchase those new breeds of chicks from step 2.
Step 4....Deal with the crowding situation in your coop.
Step 5. Admit you have a problem.
Step 6. Build a larger than necessary coop so you have room to buy more chicks.
Step 7. Buy more chicks.
Step 8. Invest in an incubator to start hatching your own chicks (claim this on your income tax under Health Care - it saved your life).
Step 9. Clear a room in your house to keep incubators, brooders, etc. you'll need the space.
Step 10.Add on to your coop and assure wife its only an addition (until the eggs hatch).
Step 11. Move to more acreage so your chickens will have more room (no other reason nec.).
Step 12.   See step 1.


I think I may go into the egg selling business...